It's been a while since this kitchen remodel actually happened but as you can tell recently I've been a little busy. Actually that's not true because "busy is another word for 'Arsehole', 'Arsehole' is another word for a guy you're dating. You deserve a fucking phone call." {He's Just Not That Into You reference anyone??} Anywho, the real reason I haven't been able to write this is because I needed decent lighting for photographs and a time to deep clean the kitchen. I mean no one wants to see a remodel with plastic Ikea cups all over the damn place do they or doooo they!
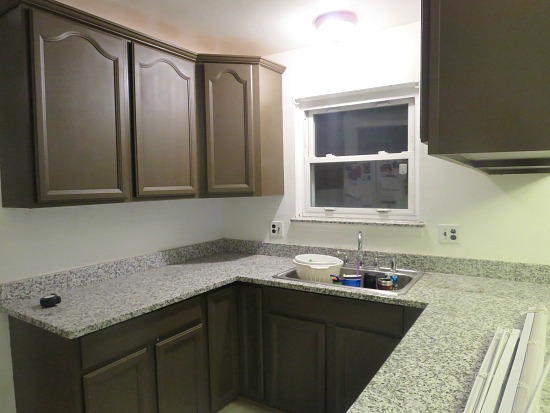
Let's start with the cabinets. I told Jerek when we moved in they would be stained, no questions. They were this ugly light oak and I hated everything about it. I had been pinning painted cabinet's for months so I figured I knew what to do. Like most things I pin I don't read 99% of them so you can bet when it came to staining the cabinets I didn't read any of this shit and told Jerek we were going to sand the cabinets and stain them a beautiful rich dark espresso. Easy right.
WRONG!!!
Long story short, the base of the cabinets were real wood but the doors were this weird fake wood laminate type thing. So when Jerek, his dad and I all took off work thinking we would bang the cabinets out in an 8-hour period we were sadly mistaken. There were some words said, some 'I told you so's' mentioned and we nixed the stain and went to Sherwin Williams and bought paint.
Yep. I was wrong, Jerek was right.
Once we painted the cabinets I turned back to Pinterest, smart right. What they don't tell you about not actually reading pins on Pinterest, is that once you paint the cabinets you need to cover them with a clear coat. Well, we never did, so if anything spilled on the cabinets and you tried wiping it off the paper towel particles would stick to the cabinet. They were looking super janky and Jerek kindly reminded me every time that it was my fault we ruined the perfectly good cabinets. Whatever dude.
Flash forward a few months and we were planning out what to do with our tax money refund. Jerek being the finance freak that he is priced things down to the penny and basically said we could 'refresh' the kitchen for about $450 and save everything else towards the wedding.
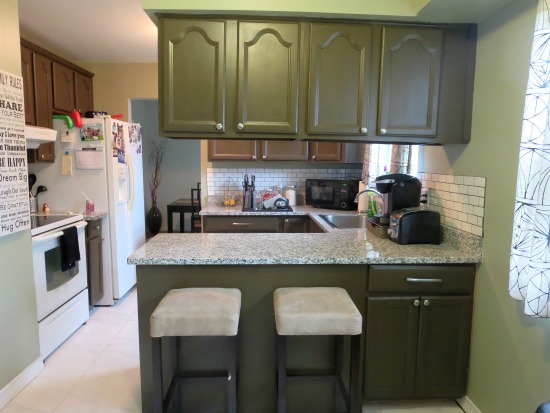
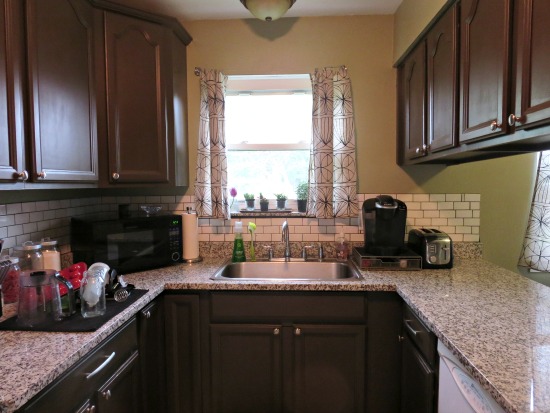
With that, we headed to the man store, {what Tracen refers to as Lowes} and we purchased tile, paint and hardware. Jer started demo-ing the horrible, tiled backsplash behind the oven which was plastered to the wall, seriously WHO does that? He ended up gutting and replacing the entire dry-wall because it was ruined from the old tile. Once that was finished we painted the walls, Svelte Sage by Sherwin Williams and I love it. It's this taupe green warm color and it makes the kitchen feel so much more inviting when you walk in.
Moving onto the cabinets, we finished what we started and put a clear gloss over them which made cleaning them 110% easier! Next time I will read the entire pin, I swear.
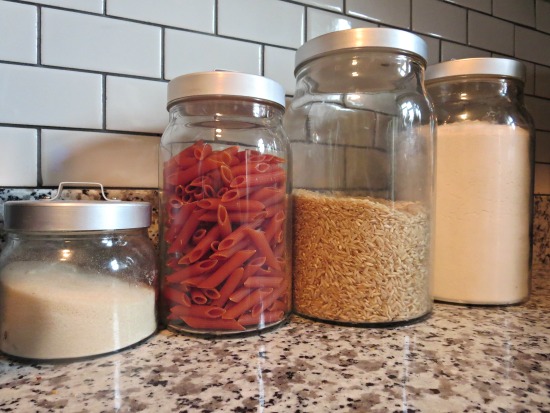
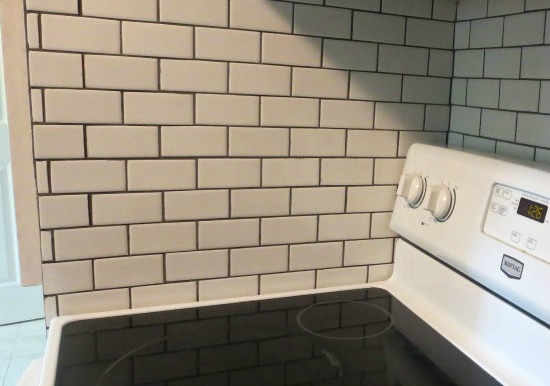
After the cabinets and walls were painted Jer got working on the tile. My heart beats for subway tile. Okay that sounds really lame but I love subway tile. All colors, all sizes, I want it everywhere. For the kitchen backsplash, we went with a smaller size since they came in 12x12 sheets and these were much easier to apply than the single large ones. I know this because I watched Jerek do it, not because I was the one that actually did anything in this kitchen. My duties were making sure no kids stuck their little grimy hands in paint, grout or tile adhesive. At first we bought white grout for the tiles but after talking to our brother in law and watching some Youtube videos, we decided that gray would be a much better option. I can't explain to you how happy I am with this choice too! It makes cleaning the tile easier and the over-all look is so much better!
After the tiling was done we fought about hardware on the cabinets for a long time and finally went with these ones. We did small knobs for all the doors and long handles for the few drawers that we had. I found curtains on sale at Ikea that were super, mega long so I cut, sewed and hemmed them to make curtains for both sets of windows, savvy right.
I love how everything turned out! I still hate all the old white appliances, but beggars can't be choosers right now, we have a wedding to pay for. Jerek and I both agree and we will probably gut the entire kitchen within the next 5 years, maybe sooner if I'm on my period one day and decide I hate the place, but for now I absolutely love it. The bar stools are from At Home, the lighting is from Lowes and the random dishes are from college, yea we really need to register for the wedding!
You're probably wondering if we really did this for $450 and I started to keep receipts to see what we actually spent but Jerek would always end up running to the store to grab things here and there and I lost track of it to be honest. If I had to guess I'm thinking it was under $600 and no more than that. We probably spent an extra $100-150 on extra supplies and random trips which isn't too bad!
When people think of kitchen remodels they think of mucho money but it doesn't have to be. You can redo or what we like to call a 'refresh' for a reasonable about of money. Remodels or refresh's can also we done WITH children in the house you just have to get creative. There's no way you'd catch me demoing the kitchen or re-drywalling something in the house, I'm much happier at the park playing with the boys while Jerek has some peace and quiet and can get some work done. Also, baby gates save lives people! We had two up at all times and basically told the kids they could have ice cream if they let daddy get work done, hey it works! Naptime and nighttime are two of the times where we got the most work done. Yes, we stayed up really late some nights working on the kitchen {or other projects} but that's because we choose to spend the daytime with the boys instead of stressed out trying to get work done. Maybe we're tired at work the next day but it's worth it when we wake up and walk into the kitchen in the morning for coffee, I promise.
When people think of kitchen remodels they think of mucho money but it doesn't have to be. You can redo or what we like to call a 'refresh' for a reasonable about of money. Remodels or refresh's can also we done WITH children in the house you just have to get creative. There's no way you'd catch me demoing the kitchen or re-drywalling something in the house, I'm much happier at the park playing with the boys while Jerek has some peace and quiet and can get some work done. Also, baby gates save lives people! We had two up at all times and basically told the kids they could have ice cream if they let daddy get work done, hey it works! Naptime and nighttime are two of the times where we got the most work done. Yes, we stayed up really late some nights working on the kitchen {or other projects} but that's because we choose to spend the daytime with the boys instead of stressed out trying to get work done. Maybe we're tired at work the next day but it's worth it when we wake up and walk into the kitchen in the morning for coffee, I promise.
Happy remodeling people!








Love it! Your sewing skills are coming along nicely :) and the subway tile is so timeless yet modern. We did that in our kitchen too (and we are in a rental, so we're stupid) except we used turquoise/seaglass color and I am in love with it! XO Chelsea play. wash. rinse. repeat.
ReplyDelete